It all started with Windows PowerToys FancyZones; and the rabbit hole was like crack-cocaine
I love Windows -- and have used it continuosly since Windows 3.1. I still regard it as the best platform for it-just-works and getting-stuff-done. However, as a developer, there is this deep-seated need to dig deeper and to tinker. It helps you learn, it keeps things fresh. With windows, there is one-way and it does not let you read the code for how it works.
So, with very large 40" 4K at 96 DPI main monitor, I needed a way to manage the window real-estate. FancyZones is a wonderful tool. It drew me into tiling window and using the keyboard to manage that. More than that, it re-kindled the joy of tinkering with the look-and-feel and work-flow of the UI. Something, I have since discoverd it called ricing, and unixporn. It was a short jump to a ubuntu (Kbuntu, KDE and Khonkite), then another jump to qtile, then to arch, then to minimal terminal and terminal-centric ranger, vim, and bash scripting.
Ubuntu KDE: kbuntu
Clean, well-architected, tonnes of options. The perfect gateway drug.
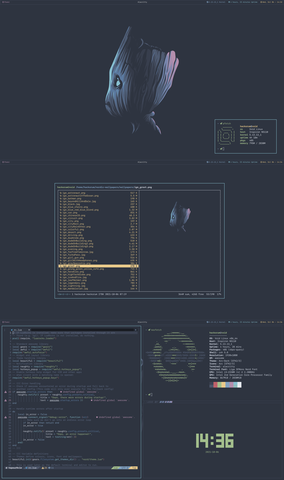
Arch & qtile
So much control, too much control, ... I am drowning... and I am loving it. #HowToBurnTime
I thought that the most dangerous thing on a computer was Civilasation VI #JustOneMoreTurn, but no -- it is fiddling and configuring the perfect unix desktop environment.
qtile is written and more importantly configured in python. So now I am enjoying learning python.
Once I discovered that arch has a guided installer archinstall, it takes no more than a few minutes to spin up a clean OS. Along the way, this teaches you what dependancies you really need and how they layer-up and inter-relate.
[Disclaimer] The icon for the article is not my own, it comes from unixporn reddit
So like….how do you choose your OS? 😆 pic.twitter.com/Gaf8pU9qI7
— Betty Junod (@BettyJunod) October 9, 2021
Clean Minimal ArchLinux Install
Base Arch Install
Watch/Follow-along on YouTube
- Download ArchLinux ISO
- Run the guided-install
# archinstall
User-Land Setup
The following script is really a checklist, that you may copy-paste the relevant parts as you do the install yourself.
# Base Utils, Dev, Network
sudo pacman -S neovim ranger zsh
sudo pacman -S base-devel git
sudo pacman -S openssh samba rsync wget

# X11
sudo pacman -S xorg xorg-xinit xterm xorg-xeyes xorg-xclock
sudo pacman -S noto-fonts gnu-free-fonts ttf-ubuntu-font-family
sudo pacman -S rxvt-unicode alacritty qtile
sudo pacman -S firefox notepadqq pcmanfm dmenu
Now, we can install dotnet and the Jetbrains Rider IDE...
# dotnet
wget https://dot.net/v1/dotnet-install.sh
chmod +x dotnet-install.sh && dotnet-install.sh

# rider
yay -S jetbrains-toolbox
More Links: